|

|
PLEASE NOTE: While the photos here are representative for this procedure, they may not be of the specific equipment you are repairing.
Important Disclaimer: This information is intended to assist you in repairing your keyboard, which is presumably no longer
under warranty. Doing this type of work will almost certainly void any existing warranty coverage. Syntaur offers this information as a free service,
and makes no warranties of any kind regarding its use. You are solely responsible for any damages, problems, or injuries resulting from opening up
and working on your equipment. Unless otherwise indicated, the keyboard should be powered off and unplugged while these procedures are being done; otherwise,
you can be exposed to potentially fatal voltages. If you do not feel comfortable or competent in performing these tasks, we strongly recommend taking your keyboard to a
service center.
This page and its contents are copyrighted by Syntaur Productions, and may not be copied or distributed without written permission. |
Replacing Keys
|
Once you have access to the keybed, remove the key return spring by inserting a small Phillips screwdriver into the spring. Simply push down to draw the spring out of the lower seat. Note that some keyboards use different springs for the white and black keys. |

|
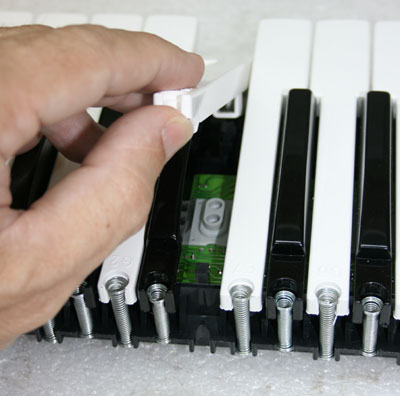
Once the key spring is removed, the back of the key should lift up easily. Slide it a bit toward the front, and the key will come free. Because the key needs to slide forward to be released, you won't be able to get any black keys free without first removing the white keys that block them in.
Simply reverse this procedure to install the replacement key. Replace the key return spring, and you're good to go! |