
|

|
PLEASE NOTE: While the photos here are representative for this procedure, they may not be of the specific equipment you are repairing.
Important Disclaimer: This information is intended to assist you in repairing your keyboard, which is presumably no longer
under warranty. Doing this type of work will almost certainly void any existing warranty coverage. Syntaur offers this information as a free service,
and makes no warranties of any kind regarding its use. You are solely responsible for any damages, problems, or injuries resulting from opening up
and working on your equipment. Unless otherwise indicated, the keyboard should be powered off and unplugged while these procedures are being done; otherwise,
you can be exposed to potentially fatal voltages. If you do not feel comfortable or competent in performing these tasks, we strongly recommend taking your keyboard to a
service center. |
You may also want to view:
Opening Up a Roland Juno-106 or HS-60 Keyboard
Replacing Keys on a Roland Juno-106 or HS-60
|
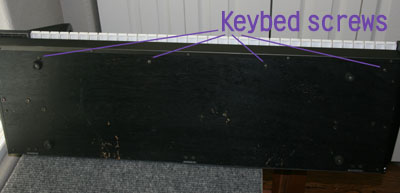
To remove a key from the keybed, you will first need to get the keybed assembly itself loose. The first step is to remove the four screws from the bottom panel that secure the front edge of the keybed assembly (see photo above).
|
|
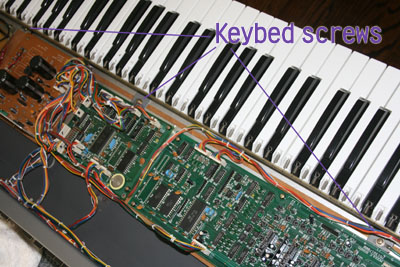
Now, open up the top panel of the keyboard to access the keybed. With the panel open, remove the three gold-colored screws (shown above), which secure the back of the keybed.
|
|
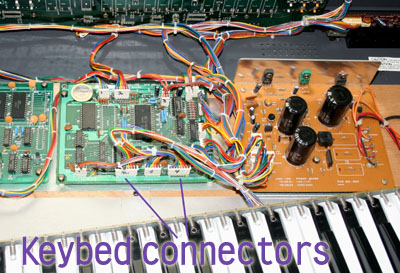
The keybed should now be loose from the bottom panel, but it is still connected by wiring. If you are replacing keys, you won't need to remove the keybed any further. But if you do need to remove the keybed completely, cut the strings that bundle the wiring into the harness of other wires. Once the string is cut, you can separate the keybed wiring from the rest.
The keybed wiring goes to two identical 8-pin connectors on the CPU board; it is very important not to plug the wiring connectors into the wrong board connectors, so use a Sharpie to mark the connectors before unplugging them.
|

|
Flip the keybed over, and on the underside of the keybed, you will need to move the clear plastic key retention strip out of the way before any keys can be removed. This strip is secured by double-sided tape; you can use a small knife to lift it up without difficulty. Start at one edge, closest to the key you need to replace, and only remove it as far as you need to.
|
|
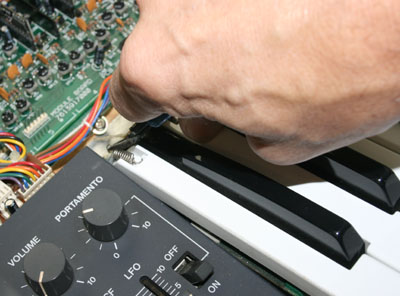
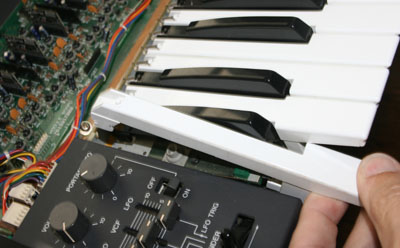
Flip the keybed back to its normal position. For the key that needs replacing, use a pair of needle-nosed pliers to grap the back loop of the key return spring. This loop just hooks over the metal back rail; simply push the loop back slighty until it unhooks from the rail, and set the spring aside.
(If you need to remove a black key, you will first need to remove the two surrounding white keys - otherwise you won't be able to push the black key forward.)
|
|
Now, simply lift the back of the key, and then pull the key away.
Install the new key in the same way, use double-stick tape to secure the key retention strip, and put it all back together. |